

So you have your guitar and your amp, and now you’re ready to start recording your ideas. Learning how to record electric guitar can be a confusing process! Today we will take the basics, and get you recording in no time.

How To Record Electric Guitar: The Basics…
Chances are, if you are reading this, you have your guitar setup ready. Maybe you have been playing for a while now, and you’re itching to get some of your ideas and riffs recorded. That’s a good feeling, isn’t it?
There’s nothing better than getting your chops perfected, and ready to be recorded. maybe you have written your own songs, and you are ready to commit them to a recording to share with your friends. Recording yourself is also a great practice tool because you can hear any mistakes.
The good news: It is much easier these days to record your guitar tracks at home. All you need is a computer and a few other ingredients to get started. Some of the things you need, you probably already have! Years ago, you needed to shell out a fortune for recording gear.
Nowadays, you get access to thousands of tube amps and effects for less than the cost of a night out with your buddies.
The bad news: While it is easier to get up and running with recording, it can be very confusing. there are a lot of different products out there, and doing a simple internet search can lead you down a rabbit hole. But don’t worry, this can be easy.
In this tutorial, we are going to assume that you already have a few things to get started. What you should have already:
- A Guitar
- An amp, or Processor
- A Pedal Setup (If that’s your thing)
- Some Basic Computer Skills
We are also going to assume that you are working on a budget. Sure there are more expensive options with tons of features. And later on, we will take a look at those as well, in another article. Today, we will focus on the basics of getting started, affordably.
You’re Going To Need A Computer!
This goes without saying, but I think I should say it anyway. You will need a computer, with a decent bit of memory. As far as RAM goes, you will want at least 4MB, but preferably 8MB. The CPU itself should be relatively new as well.
Some people go all out (like me) and have a crazy amount of processing power for big projects. But today we are just talking about guitar, not recording your whole band. Honestly, you really don’t need anything high end and special.
A simple laptop or desktop will do. It needs to have a USB port, so no Chromebooks or anything like that. But just about any standard computer will work.
You can also use the type of computer you prefer, as all of the options I listed, are compatible with Mac and PC. Which one you decide to use is a personal choice. Chances are, whatever computer you already have will get you going easily.
With all of that in mind, we can take a look at the first thing you want to buy. The “heart” of your recording setup, so to speak.
How To Record Electric Guitar: The Computer Interface

This is one of the most confusing aspects of getting into home recording. There are over 100 computer interfaces out there, and they all technically do the same thing, to varying degrees of quality.
What does a recording interface do?
A recording interface acts as a gateway from your amp/processor/mic to your computer. These are absolutely essential to recording computer-based audio production. In most cases, there is no “input jack” on your computer.
They are used for not only music, but podcasts also. Anything that requires audio being sent to your computer, needs an interface.
There are different ways to use an interface. You can plug in directly and use an amp sim (more on this later) or you can use a microphone to mic your guitar amp. You can also use a guitar processor/guitar amp straight into the interface. We will get to how all of this works, I promise!
No matter how you plan on recording, the first step is a decent interface.
There are a huge selection of interfaces out there. So let’s take a look at a couple of the easiest to use interfaces, that will get you started quickly!
#1 Focusrite Scarlett 212

This is by far the easiest to use interface that I have come across in the past decade. I use one at home, for professional uses! But The Scarlett is not just for the pros. It has an easy to use design, and comes packed with high class features:
- Brushed metal casing
- 2 high headroom inputs (1/4” and XLR)
- Powerful preamp
- Works with all computer OS
- Low Latency recording
- Master playback volume
- Dual Channel
- Recording volume controls for each channel
The best thing about the Scarlett 212 is the versatility. It will work with any computer, via USB. You get clear, well processed recordings from the unit from the technology inside. This means you don’t have to play around with a million external settings.
The Focusrite Scarlett is “plug and play”. You computer will automatically download the drivers and other essential parts to get the interface working. So being tech savvy isn’t important. Computer knowledge isn’t going to stand in the way of you getting the unit up and running.
The built in preamp does a lot for your guitar sound, the only downside being that you can’t really control the natural tone of the recorded sound. On the plus side, the preamp is pretty subtle and only adds a bit of depth and clarity.
The Scarlett 212 is on it’s 3rd generation now, but remains mostly unchanged in design. There have been a few tweaks here and there. I have the 1st generation, and I can’t really tell a difference with the newer models. The fact that I have had this little interface for almost a decade, is a testament to the quality!
#2 Behringer U-Phoria Interface

Behringer makes some pretty nice gear for people on a budget, and they always have. While it may not be expensive, the U-Phoria definitely gets the job done without any fuss. Just like The Scarlett, it comes packed with similar features:
- 24 Bits
- 197 KHZ
- MIDAS Design preamp
- Metal Housing
- Works with any OS
The Behringer is almost identical to the Scarlett in design and function. It also has a built in preamp that makes your recordings “pop” a little more. It is also “plug and play” so it has no complicated setup you have to learn.
The difference between the Behringer and The Scarlett is minimal, but the Behringer has a dedicated guitar input, as well as a channel for microphones. The possibilities are endless when it comes to an all-in-one interface.
You can’t really go wrong with either choice. Maybe you want something a little more expensive with more built in features? Maybe you already have a basic interface and you want something that is a step above?
Ok, I hear you. Let’s look at one expensive one.
#3 Universal Audio Apollo Twin

The Universal Audio Apollo is definitely a step up form the other two interfaces I have listed, and it is nearly triple the price. This is because it does not skimp on features at all. It comes loaded with them:
- Dual Input
- UAD Plugins Built in
- Unison Mic Preamp
- Antares Auto Tune
- Stereo Headphone Jack
- Zero Latency
- For Windows only
- Attaches to a ADAT, Computer, PDIF
- Metal Housing
The UAD Apollo is a big step in technology when compared to the other units. This is because the UAD plugin collection and even genuine Auto Tune is built into the unit. This will take some knowledge and programming to get set up.
These plugins are all handled by the built in DSP of the Apollo, which means it doesn’t burden your computer’s memory with effects. Everything is done in the unit. This includes a built in low cut, and pad switch.
If everything I just typed sounds like nonsense to you, then definitely skip the Apollo. It is a pretty awesome interface, and it can perform a lot of different applications really well. But the catch is; you have to know how to set it all up.
I figured I would list it here for people that are very tech savvy and are wanting an interface that you will not need to upgrade in the future. Some people like to have everything at their fingertips from the get-go. I understand that, and the Apollo is a fantastic start.
So once you have a decent interface picked out, you are going to need a place for all of those riffs to be recorded!
How To Record Electric Guitar: Digital Audio Workstations/DAW

Now That you have an interface all picked out and ready to go, you’re probably itching to get some riffs recorded. Now all you will need a Digital Audio Workstation, or as we refer to them; a DAW.
Years ago, all recording was done on tape machines. These were big and expensive, and required a mixing board and outboard equipment to function. As the processing power of computers sky-rocketed, tape became mostly obsolete in the recording world.
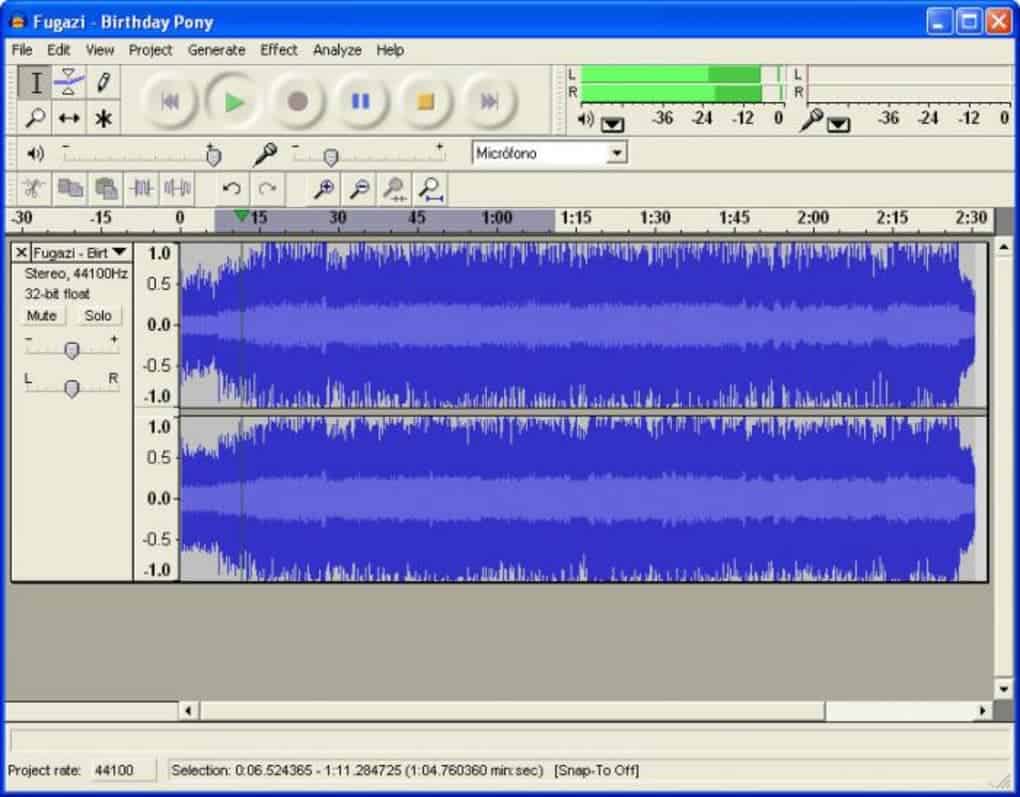
A DAW is basically a program that you download to your computer, that acts as a visual interface for your recordings. You can use your DAW not only to record audio files, but edit them as well. You can also use a DAW to add plugins.
Plugins can be a myriad of effects that usually would be an outboard piece of equipment. Things like compressors, reverb, and tape delay are all now a part of your DAW. So now, the only real piece of equipment you need, is your computer!
A DAW can be expensive when you get into the realm of professional workstations. You have probably heard of Pro-Tools before, and that is one of the more pricey ones. These professional DAW programs are powerful, and the possibilities are limitless.
But if you are just getting started, you will be swamped by these pro models and all of their features. We just want to record guitar right? They are very complicated, expensive, and take a lot of time to learn.
Luckily, there are two simple, free versions of DAW software, that will do everything you need to get started recording:
Audacity DAW: Simplicity At It’s Finest
Audacity has been around for years now, and it is a perfect beginner DAW. There are not many features when it comes to editing or MIDI functions, but those are not things you are worried about, right?
Audacity is free, and open-sourced software. It works with any type of computer or operating system, and takes up minimal CPU function. It was developed by a group of volunteers to be an easy way to edit audio, without shelling out a ton of money for features you may never use.
Audacity has been used for years for podcasts, and recording simple instrumental ideas. It comes with a few free plugins that you may find useful, and can host a variation of third-party software.
All you need to do is click “add new track” and press record. It honestly does not get any more simple than that.
If you just need a free program that records your guitar, and is easy to use, then Audacity is the way to go. It is a program that can grow with you, and gets easier the longer you use it. Many producers will tell you they have used Audacity before due to it’s ease of use.
15 years ago, I recorded an entire EP on Audacity! But maybe you want something a little more advanced, yet still affordable?
Reaper DAW: A Free Professional Option

Reaper is a bit of an anomaly when it comes to free software. Because while it can be a basic DAW for just recording your guitar for the first time, it can also be used to produce an album!
Reaper is free to download for any OS, and it takes up very little CPU to be such a powerful DAW. You could run Reaper just fine on a few potatoes and a graphing calculator. I’m kidding, or am I?
While Audacity is a very bare bones program, Reaper is a fully professional DAW. It comes with a whole suite of plugins (over 100) and it is used in quite a few big studios. While Audacity is made for any type of audio, Reaper is more for music production.
The best feature about Reaper is the design. When you first download it, the program looks very simple to use. You can click “add new track” and the press record, just like Audacity. The basic program is simple.
But you can also customize Reaper any way you want. I could get very deep into what this means, as I have mine fully customized for my workflow. Though, I don’t want to confuse anyone out the gate! Lots or nerdy tech stuff can be said about Reaper.
While you may eventually outgrow Audacity, there is no chance that you can do the same with Reaper. I have used it for almost a decade now, and I still find new features on a daily basis. For a long-term solution, Reaper is a amazing DAW.
While the download is initially free, you can choose to pay for Reaper if you choose. While most DAW programs are easily in the hundreds of dollars range, Reaper asks that you pay about $50. This is a bargain for all the features you are getting.
Reaper is also being constantly upgraded by their team of audio professionals. Once you purchase the program, you will get the updates for free. This makes Reaper almost future-proof in design.
There are other free DAW programs out there, but I wanted to pick the two easiest ones to get started. You can’t go wrong with either of the choices, and you will be ready to learn how to record electric guitar.
So what’s left? The prep phase is finally over! You have a computer, an interface, and a simple DAW. Now we can look at the different ways to actually record your guitar.
How To Record Electric Guitar: Methods

OK. You have an interface, and you have a computer. You have picked out the DAW that is easiest for you to use. Now what do you do?
There are basically four ways to get started recording guitar, and it is all based on your current equipment. Let’s take a look at the ways to record guitar:
- Microphone to Amp (Traditional)
- Processor to Interface
- Amp To Interface
- Guitar Sims/ Plugins
Microphone To Amp

This is how the pros do it in big studios across the world. But this is probably the hardest method to get started with, as it takes a little experience with mic placement to make it sound good.
First, you will need a microphone plugged into your interface. Next, you need to place that mic on the cone of your amplifier speaker. There is a sweet spot for every speaker, and you will probably have to spend some time finding the right placement for the mic.
While this is a traditional, tried-and-true method of recording guitar…it can also be complicated and frustrating for a beginner. There is also the issue of being loud, since the amp has to be at a certain volume for the mic to pick up the sound.
All around, do I recommend this method? Not at a beginner level. If this is the first time you are recording guitar, the process will probably frustrate you before you get it to your liking.
But if you already have a microphone that is suited to recording guitars, and this is the route you want to go, I say try it out. Because at the end of the day, this is a simple way to capture your guitar playing. If you think you can do it, then why not take the plunge?
But there are easier ways out there to record guitar these days…
Processor To Interface

If you already have a processor that you like to use with your amp or stand alone with headphones, then great news! Most processors also works directly with an interface! We have mentioned how easy this is before, but now we can go in depth.
Most processors are made to feed their signal directly into an interface these days. They do this by having amp models, and effects built in. These are ready to rock straight out of the box.
For me, this is the easiest way to start recording your guitar. Everything you need is right there on the processor, and you can make changes on the fly while you are recording. This is simple, and takes the least amount of time to set up.
If you own a guitar processor, then you probably already have some patches that you like to use frequently, or you have custom made your own patches. Every processor has a “mono out” that you use to plug into an interface. So you literally plug it in, adjust the volume, and get to recording!
Amp To Interface

If you have a popular modeling amp like the Fender Mustang, or the BOSS Katana, then you can use these amps with your interface as well. We wrote why these amps were such a good choice for beginners, and one of the reasons is how easy it is to record with them!
Most modeling amps have a jack on the back of the amplifier that can be used to record directly. These are usually labeled “out” or “headphone out”. Check your user manual and see which output you use to plug into your interface.
There is a huge benefit to this method, as you already have your amp dialed in the way you want. All you have to do is plug into the interface and start riffing!
I have done this with the BOSS Katana amp, more than once to do guitar overdubs on an album. The modeling tech has come a long way, and it sounds very natural through your interface. I found that you just need adjust the volume of the amp. The tones remain intact!
Guitar Sims And Plugins

Amplifier simulators are the newest, and most popular way to record your electric guitar these days. They started getting popular with Amplitube and BiasFX by Positive grid. Over the past three years, they have become an important tool for guitarists.
An Amplifier Simulator is exactly what it sounds like. It is a program that runs in your DAW, and works as a virtual amp. These sims usually have an interface that looks like a real amplifier, and you use the computer mouse to turn the dials and create your tone.
I find these to be very useful for portable recording. All you need is your computer/interface and your guitar to record. I use them for practice as well, with my laptop. But they are used professionally as well, everyday.
Years ago, these were downright awful. The sound was often “fizzy” with high gain tones. To say they were lackluster, is a gross understatement. It’s a good thing developers never gave up on them.
Because the technology has reached a much higher point in quality. These sound great, and come at all kinds of different price points. But most are certainly cheaper than a real amp, and a full pedalboard.
Many amp sims come with a range of effects pedals that can totally replace your whole physical setup. I can see how this can be daunting at first, because it is a lot to take in. My whole amp rig on a computer?
While that can sound controversial at first, I encourage you to at least try it out. You don’t have to sell off all of your physical gear! There’s no harm in using different tools to achieve your recording goals.
I’m going to list my favorite ones that can be downloaded and used for free. These can be upgraded for a premium, but the free models are very usable, especially for Metal guitar. Should you choose to buy any of the “paid” editions, the choices are vast.
This is the biggest advantage to using an amp sim, as you can have a huge collection of virtual amps at your disposal. It is akin to having a literal wall of amps to choose from, depending on your mood. Let’s take a look at the ones I have tried out for Metal guitar.
#1 Amped Roots by ML Audio

This is a recent addition, and I have to say…this is a great free amp sim.
Amped Roots is tailored for Metal guitarists, and the free version comes in the form of the signature sound of Ryan “Fluff”. The popular Youtuber based his amp on the popular 5150/6505, with some interesting tweaks. There are also other models he is working on, like the Friedman Demo version, which is a paid feature.
However, the free version is my favorite of the models that ML Audio offer, even though ML also has some great sims for other amps. This is one of the best Metal amp sims I have ever tried, and I have used it on a few recordings. Not only does it blend with a processor/real amp, but it sounds great all by itself.
In short, this free sim chugs hard. It was designed to record monster riffs.
To unlock all of the features, you do have to pay a fee. Personally I think it is worth it! The models are pretty affordable for what they managed to encapsulate across all the varied designs.
#2 LePou Amp Pack

LePou seemed to come out of nowhere with their free “Amp Pack”. Instead of just getting just one free amp to try out, you get several! These are all made specifically for high gain shredding and riffing.
- LeCto: Based on the Mesa Boogie Rectifier
- Le456: Based on the ENGL Powerball
- LeGion: Not based on anything, but is a great high gain amp
All of these sims sound very close to what they are attempting to model. Now, I don’t think LePou sounds quite as good as Amped Roots, but they can certainly hold their own. The Mesa Boogie amp sim is my favorite, and it sounds absolutely brutal.
Lepou is a great option for anyone wanting to try out a high quality amp sim for the first time. They make other amp models, that are not based on Metal amps. I was also surprised to find that these do not take up a ton of CPU power!
#3 Kuassa Amplifikation Lite

This is the final one on my short list of Metal amp sims, but it right up there in quality with the other two. The Kuassa is not exactly based on any amp in particular, although the settings are reminiscent of the Peavey 5150. The tone, however, is totally unique. At least it is for me…
I found the three channels to all be usable. The “lead” sound is particularly good for heavy riffing. I have a hard time putting my finger on the tone. But if I had to compare it to something, I would say it sounds like an ENGL/Peavey hybrid.
The layout is super simple, and easy to dial in a good tone. So if you’re looking for an amp sim that is well-balanced and user friendly, the Kuassa works just fine.
In the end, all of these amp sims are great tools for someone on a budget. Since these are free, you can download them all and choose your favorite!
How To Record Electric Guitar: Some Final Thoughts
I hope we have shed some light on how easy it is to get set up to record your guitar tracks. Guitar players often want to get started, but there are so many choices that option paralysis sets in. It seems extremely complicated and expensive at first glance.
But that is the case with a lot of guitar oriented subjects, isn’t it? Everyone great guitar player was new once. There’s nothing wrong with getting intimidated, or frustrated. It comes with the territory.
But the advantages outweigh the complications. Especially if you want to use your DAW as a teaching tool. You can load your favorite songs into a DAW, and play along to learn the song. You’ll hear all of your mistakes, I guarantee you!
Beyond using recording as a teaching tool, it is a great way to save all of your riff ideas. There is no worse feeling than writing an awesome riff, and forgetting it the next week. I have a “riff bank” in my DAW where I store all of my song ideas, so those great riffs never get lost in time.
Recording is a different animal than guitar playing, but it is definitely in the same species. I hope you use this guide, and get to recording ASAP! In the end, recording is a great tool to add to your arsenal.
Leave a Reply